Trusted Seattle Service Company for Garbage disposal leaks from bottom
Facing leaks from the bottom of your garbage disposal? SeattleAirSuperior tackles this common yet frustrating issue head-on, offering quick, reliable fixes and top-tier customer service.
Discover our targeted solutions and features designed to restore your disposal’s efficiency and ensure your kitchen’s cleanliness and safety.
See Our Great Reviews On Google
Our AC Services

Initial Steps to Take When You Notice a Garbage Disposal Leak
When you notice a leak under your garbage disposal, act quickly to prevent further issues.
- Begin by turning off the power via the reset or circuit breaker. This will allow you to safely examine the leak without risk of injury.
- Place a bucket or pan under the leak to catch any drainage.
- Check all connections to see if something has come loose.
- Tighten any loose drain connections or mounting bolts.
- Inspect the disposal body and seals for visible cracks or deterioration. You may need to manually rotate the disposal blades to view all sides.
If repairs beyond your skill level are needed, contact Seattle Air Superior to replace worn or damaged parts. Acting fast will minimize water damage and potential electrical hazards.


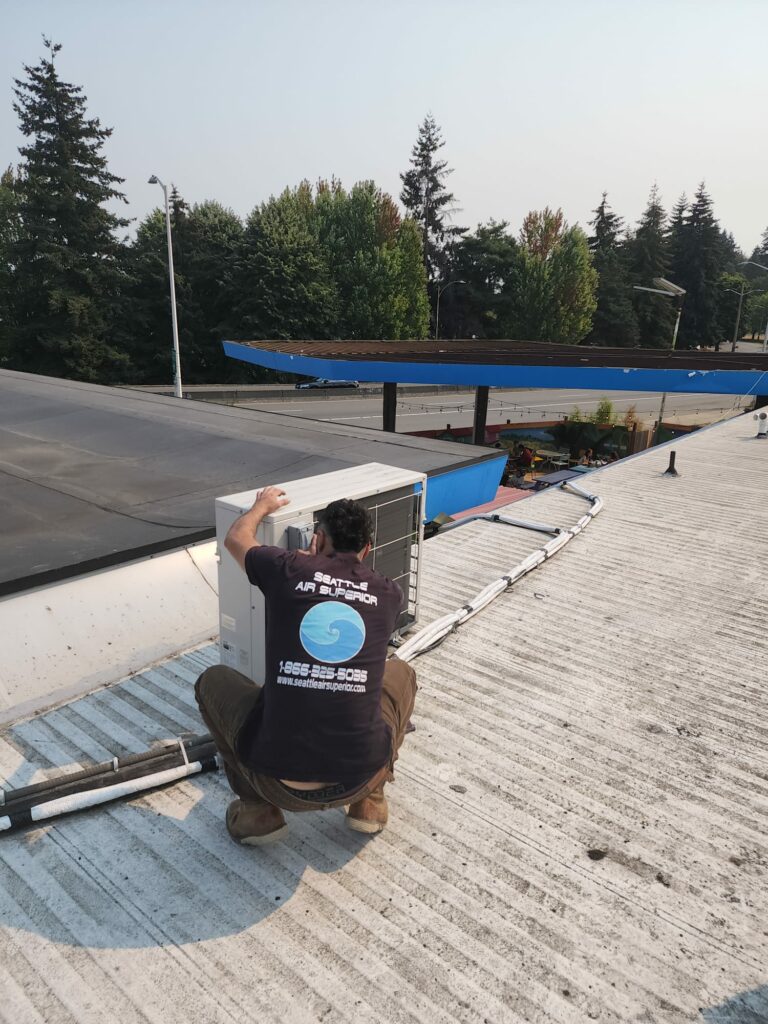
Commercial Air Conditioning Unit Maintenance by seattle air superior Technician on Rooftop

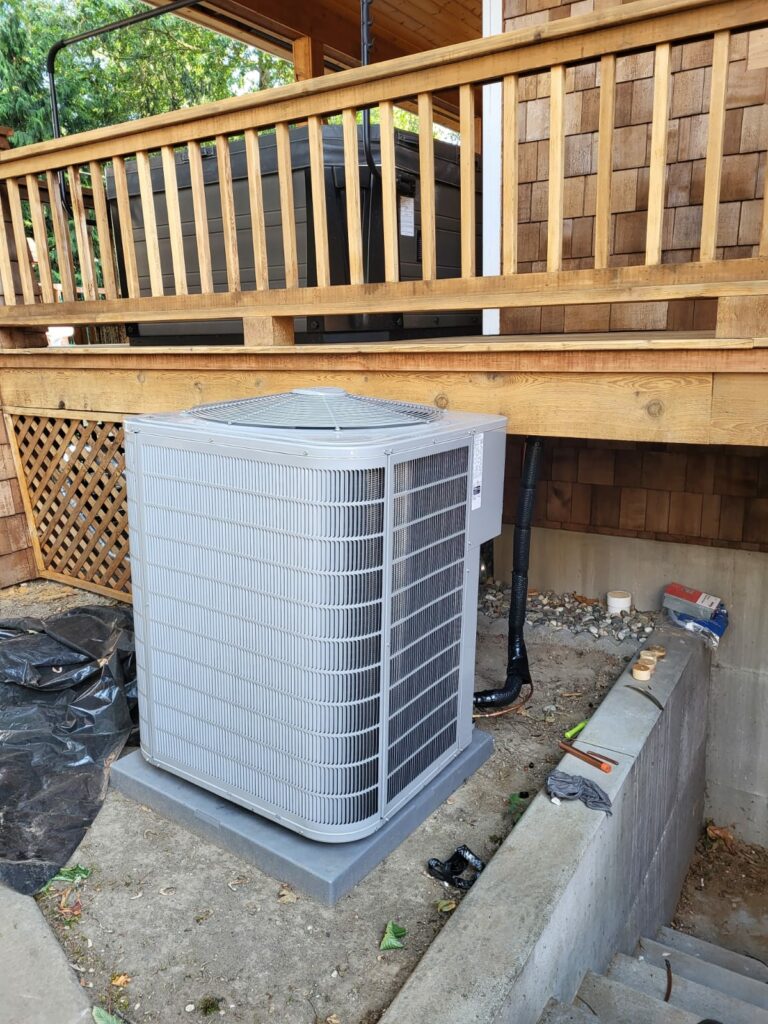
Home Air Conditioning Unit Installation Beside Wooden Deck

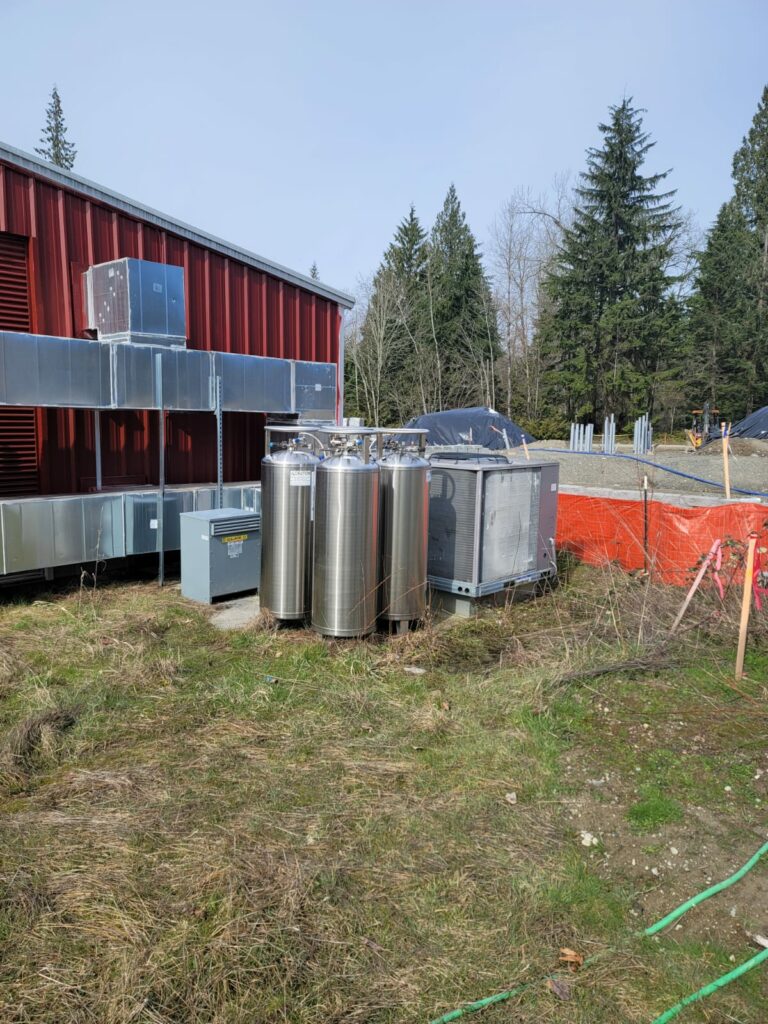
Commercial HVAC System and Tanks Beside Industrial Building

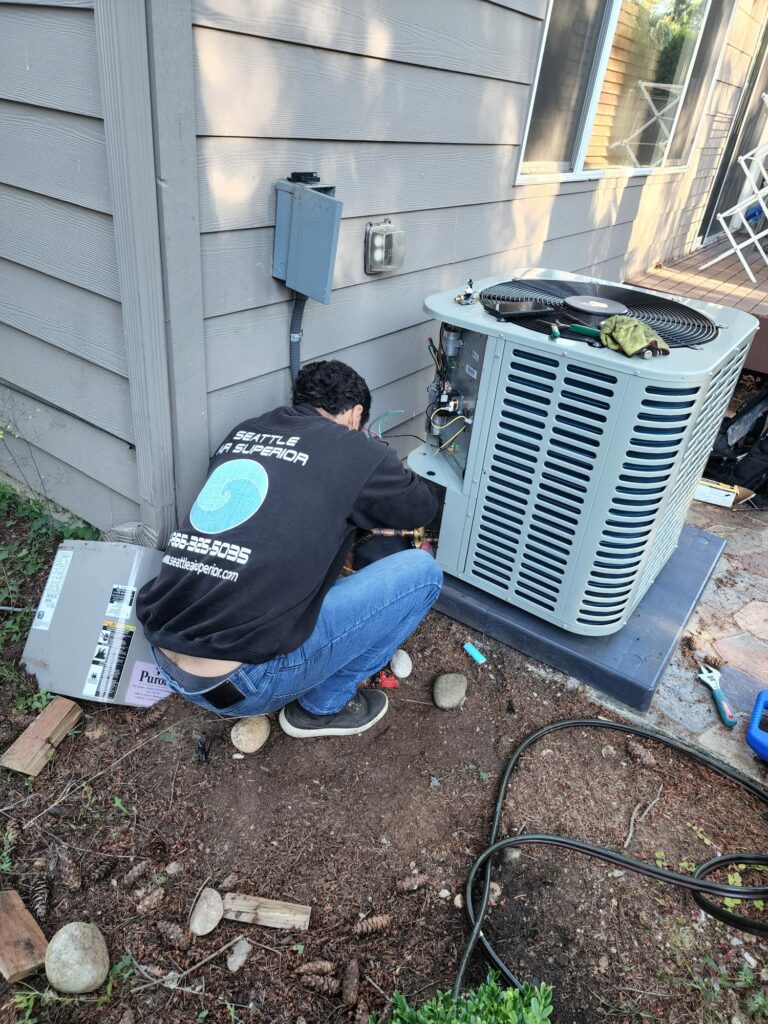
Residential Heat Pump Repair by 'Seattle Superior Air' Technician

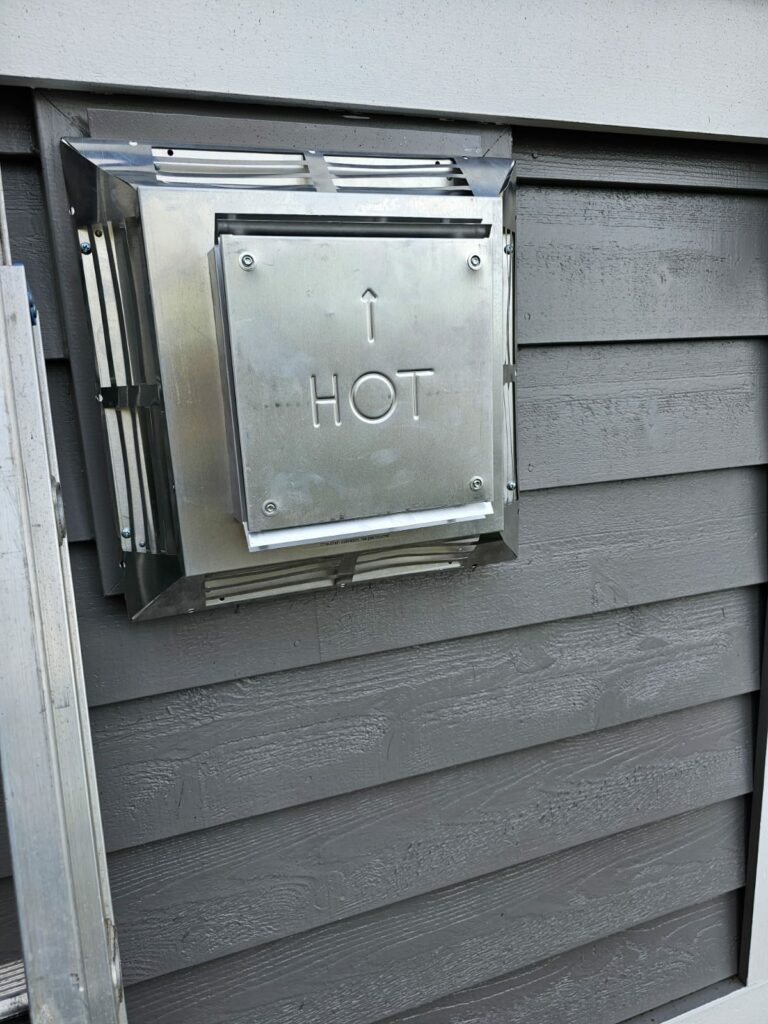
High-Efficiency Furnace Hot Exhaust Vent on Home Exterior

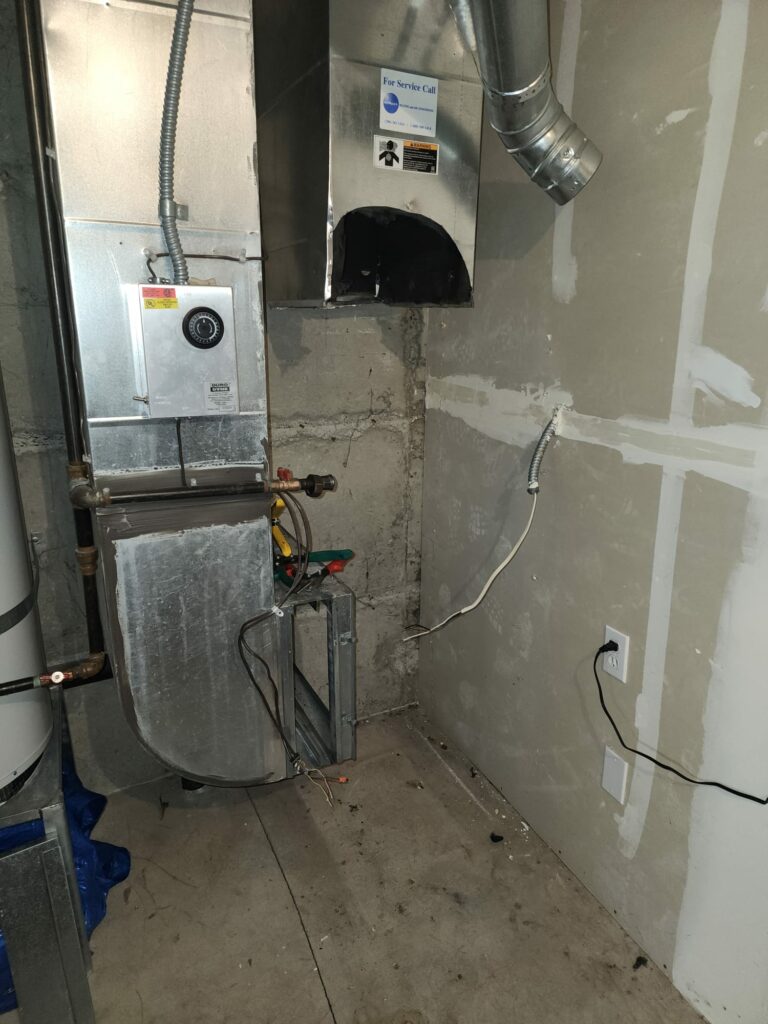
HVAC System Installation and Setup in a Residential Utility Room

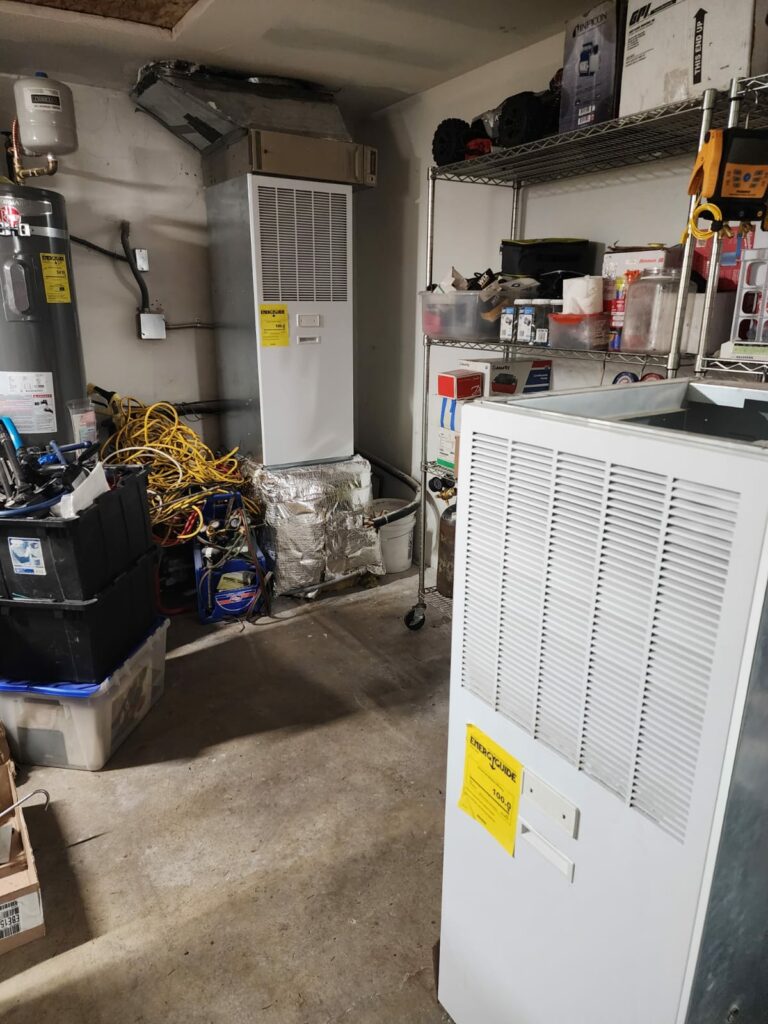
Organized Residential Garage with HVAC and Water Heating System

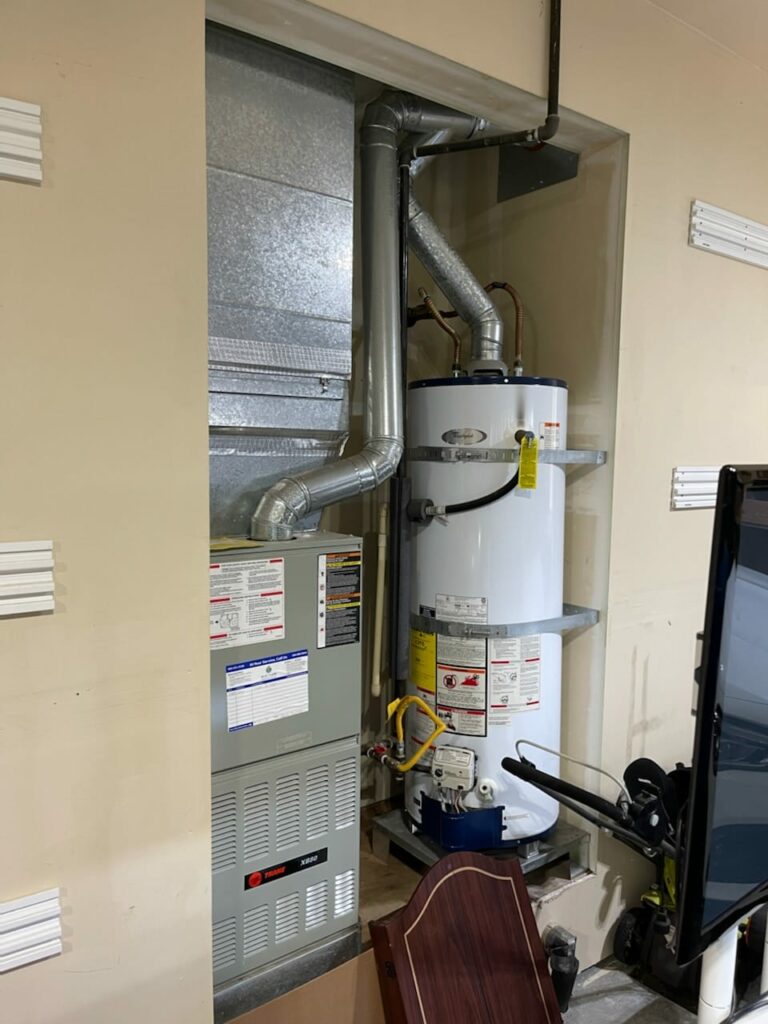
Modern Trane Furnace and Gas Water Heater Setup in a Home Utility Area

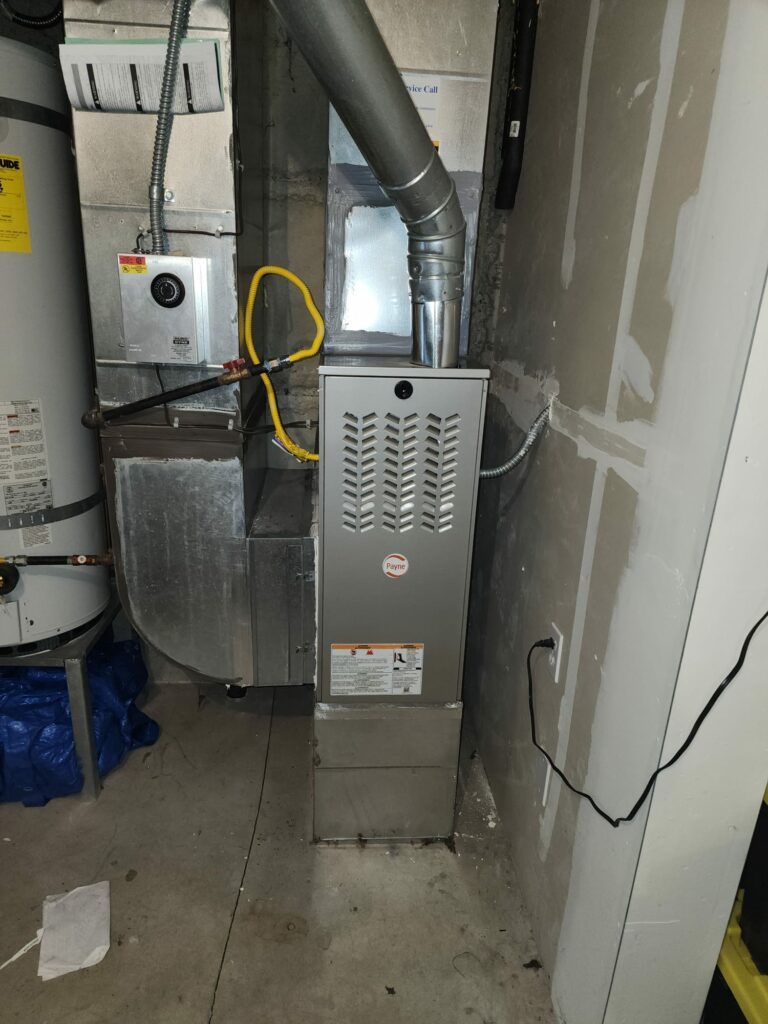
New Payne Furnace Installation with Ductwork in a Residential Utility Space

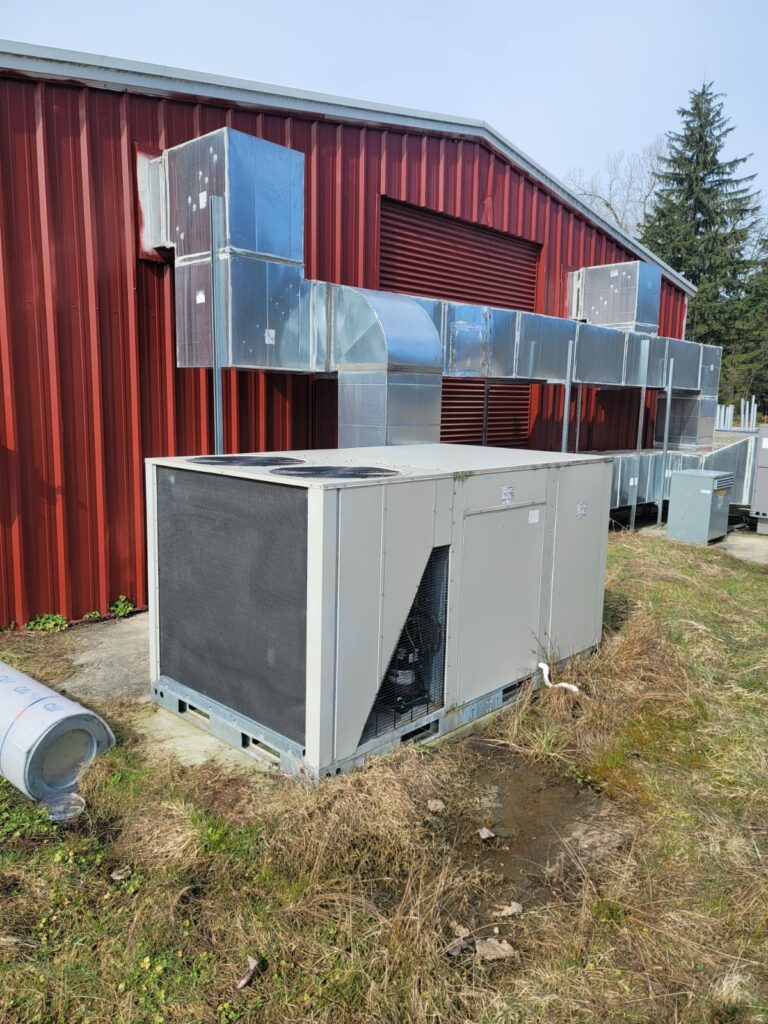
Industrial HVAC System and Ductwork on the Exterior of a Metal Building

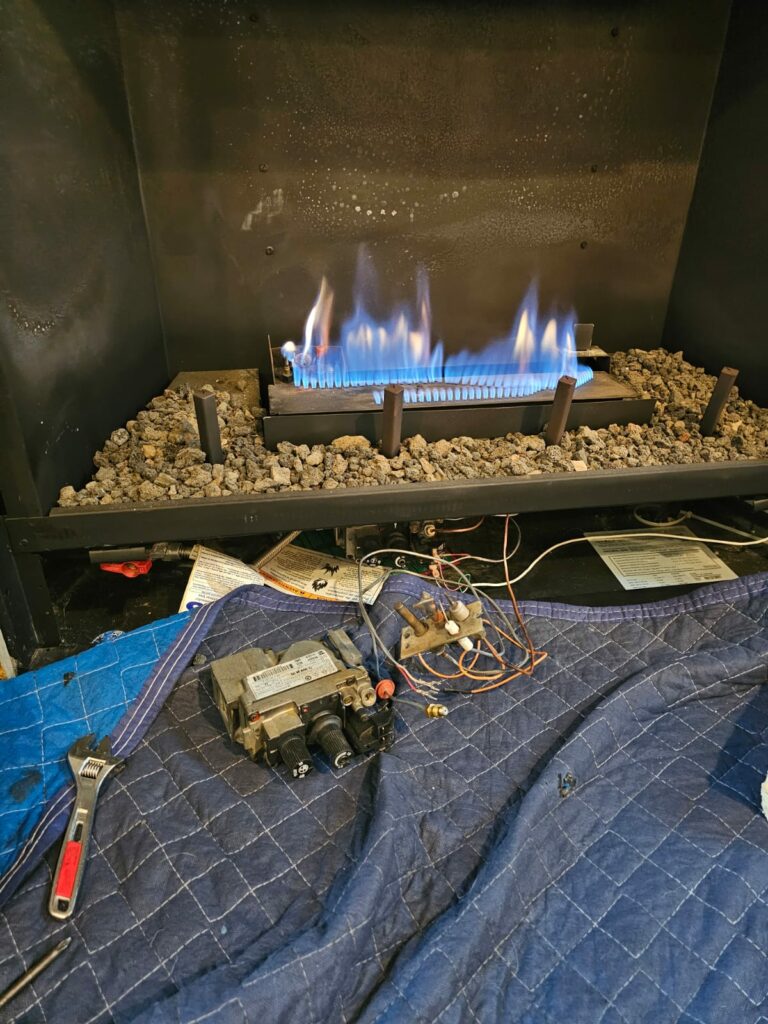
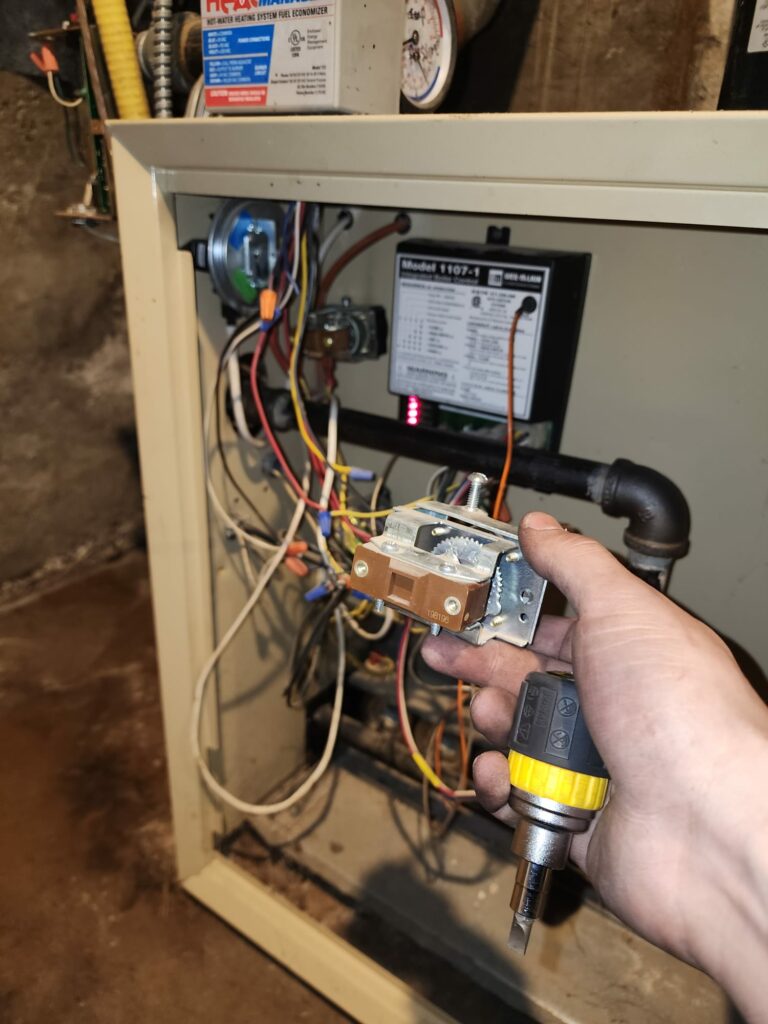
Gas Fireplace Service and Repair with Exposed Valve Assembly

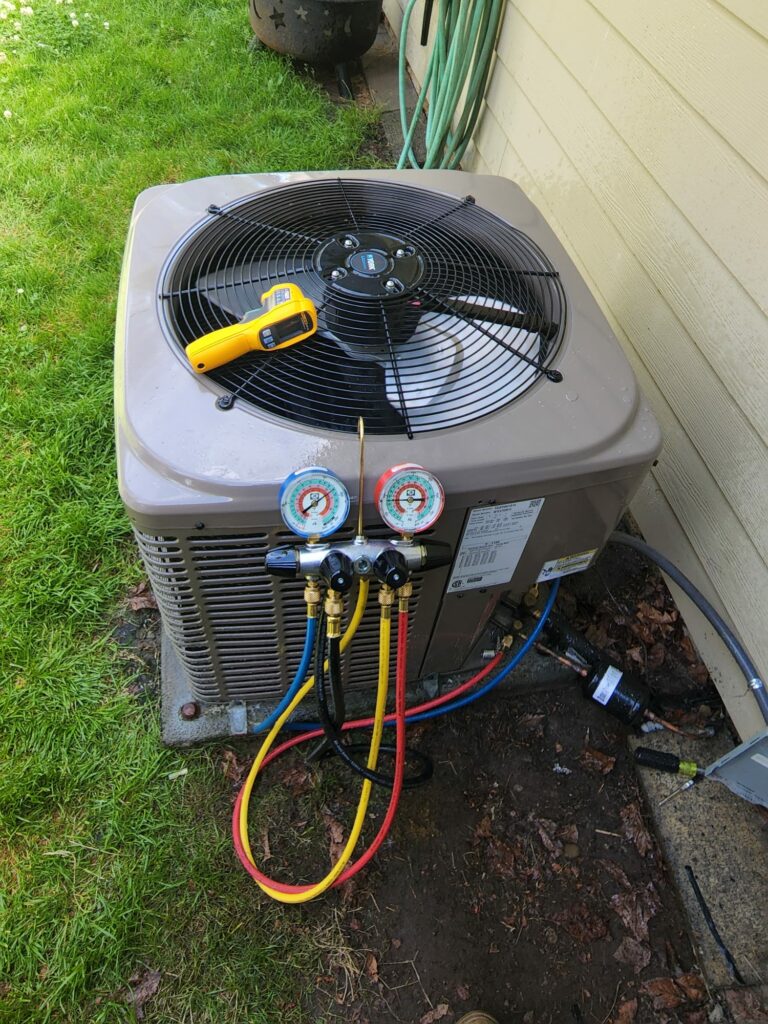
Residential Heat Pump Diagnostic and Pressure Check Procedure

Replacing Ignitor in Gas Furnace During HVAC Maintenance

Causes of Garbage Disposal Leaks from the Bottom
It’s never pleasant to discover garbage disposal leaks from the bottom. Not only can a leak create a messy clean-up, but it can also lead to water damage and potential electrical issues if left unchecked. There are a few key reasons why your disposal may start leaking from the bottom.
Here’s what you can do:
- First, worn out seals are a common culprit. The seals help prevent leaks between the components in your disposal. Over time, these seals can crack or lose their flexibility, allowing water, food debris, and grease to escape.
- A second cause is improper installation or overtightening of the mounting assembly. If the disposal isn’t aligned properly or bolted too tightly underneath the sink, leaks can occur.
- Clogs can also lead to leaks, as a blocked disposal may allow water to back up and overflow from the bottom.
- Additionally, corrosion over many years of use can develop small holes in the body of the disposal, resulting in leaks.
- Finally, general wear and tear with older disposals can allow leaks to form.
Troubleshooting Garbage Disposal Noise Along with Leaks
It’s common for a leaking garbage disposal to also begin making unusual noises. This typically indicates a problem involving the mounting assembly, blades or seals.
As you troubleshoot the leak, pay attention to any grinding, squealing or vibrating sounds coming from the unit.
Loose mounting bolts can allow extra vibration along with leaks at the flange. Worn bearings or seals often create high pitched squealing combined with small drips.
If the blades have become misaligned due to damage or debris, they can start loudly grinding against the disposal housing.
Steps to troubleshoot noise and leakage issues include:
Step | Action | Purpose |
---|---|---|
1 | Carefully inspect mounting ring alignment and tighten any loose bolts. | To ensure stability and prevent noise and leaks caused by poor mounting. |
2 | Check blade rotation for smooth spinning movement. | To identify and rectify misaligned or jammed blades that can cause grinding and leaking. |
3 | Examine seals for deterioration and replace any out of shape or cracked gaskets. | To address the root cause of noise and leaks by ensuring all seals are intact and functional. |
Our Happy Clients
Review Us On


Safety First: Dealing with Electrical Components in Garbage Disposals
When repairing any leaks in your garbage disposal, safety should be the top priority. Disposals contain both electrical components and sharp, potentially dangerous blades.
Any time you need to examine or repair a leaking disposal, make sure to unplug it or turn off the power at the circuit breaker. Never stick your fingers blindly into a disposal or attempt to manually move the blades. Even with the power off, the blades are sharpened and can severely cut you.
Wait at least 5 minutes after powering off before attempting to rotate the blades manually to inspect seals. When reconnecting or replacing any parts, avoid contact with any wires or electrical terminals. Faulty connections can lead to shocks or electrical shorts.
Unless you are highly experienced with electrical repairs, it’s advisable to leave any replacement of electrical components to a professional plumber. Always exercise extreme caution when dealing with the inner workings of your garbage disposal.

Water Damage from Garbage Disposal Leaks: What to Look For
It’s important to promptly address any water leaking from your garbage disposal to prevent household damage. There are several signs to look for related to water damage:
- First, inspect under the sink and disposal unit for water marks or stains. Prolonged dripping can soak into cabinetry and warp the underside of the sink rim. Damp areas that haven’t fully dried lead to mold and deterioration over time.
- Next check around the base of cabinets and any walls or floors surrounding the sink. Water has a tendency to spread outwards and penetrate adjacent materials. If the disposal leaked overnight, you may come back to find swollen lower cabinet panels or bubbling laminate around the flooring.
- Also examine the disposal itself for internal corrosion and rust if it’s been leaking for awhile. The repeated exposure to water can speed degradation of the metal housing and internal components. This hastens future breakdown, so the disposal must be replaced.
If the leakage has gone on too long before being discovered, you may unfortunately find water stains and damage have already set in on surrounding surfaces. But by thoroughly inspecting the affected areas and taking prompt corrective action, you can avoid permanent household damage and unsafe mold growth. Catching the leak early is the priority.
Long-Term Solutions for Recurring Garbage Disposal Issues
While quick fixes may temporarily solve garbage disposal leaks and damage, implementing long-term solutions is imperative to prevent recurring issues.
Continually repairing leaks from worn components is inconvenient, costly, and leaves open the possibility of future water damage. Investing in the following comprehensive upgrades will provide lasting protection:
- Install a new, high-quality disposal unit to replace an older model prone to cracking or corrosion. Choose a trusted brand that offers at least a 5-year warranty and improved seals.
- Upgrade to a disposal flange that includes a thick rubber sealing gasket along with a sturdy metal mounting bracket for realigning with the sink drain. This resolves alignment issues.
- Improve drainage lines by checking for any obstructions or cracks in existing pipes that could divert leaks. Consider rerouting drainage to minimize bends or slopes if necessary.
- Add a drip tray beneath the disposal to contain normal condensation drips and provide an extra barrier if small leaks reoccur. These are simple to empty and clean.
- Following through with permanent upgrades provides true reliability against leaks re-emerging.

How to Clean and Maintain Your Garbage Disposal After a Leak
If your garbage disposal experienced recent leaks, proper cleaning and maintenance afterwards can return it to full working order and help prevent future issues.
Start by deodorizing the unit to eliminate unpleasant odors from standing water or waste residue. Scrub the inside of the disposal with baking soda and vinegar, then grind a lemon peel to freshen the scent.
Check and clear the drain line of any obstructions that could have caused backflow of dirty water. Flush the disposal with hot soapy water.
Next, inspect all gaskets and seals for damage. The seals may need replacement if they became overly softened from liquid exposure or retain debris impacted in the cracks. A little petroleum jelly can refresh plastic or rubber gaskets; tighten any loose mounting hardware.
Finally, prevent future trouble by changing your disposal habits. Don’t grind extremely fibrous or hard items that can jam the works. Run plenty of cold water before, during and after grinding to fluidize waste.
Consider a monthly maintenance treatment of baking soda ice cubes to clean the disposal blades and walls while freshening odors. Proper techniques will keep your disposal running cleanly after repairing leaks.

The Role of Seals and Gaskets in Preventing Disposal Leaks
The seals and gaskets within your garbage disposal play a crucial role in preventing leaks from the bottom or along the mounting assembly.
The main seal is located along the flange or “slip collar” at the top of the disposal, just below the sink drain. This thick gasket provides protection against leaks between the mounting ring and disposal body.
It compensates for any misalignment with the sink drain. Another key seal can be found along the rotor ring near the bottom of the unit. This seals the spinning assembly that contains the grinding blades and prevents debris and liquid from working its way downward.
Finally, smaller seals around the electrical cover and wiring help protect those components. The gaskets and seals continually experience wear from friction, heat, and exposure to garbage and liquids. Over time, normal use degrades the flexible rubber and allows leaks to occur.
As the seals weaken, they can also allow the disposal components to shift subtly out of alignment, further increasing leaks. By replacing worn out seals and gaskets periodically as part of disposal maintenance, you can substantially prolong the life of your unit and prevent unpleasant leaks from developing.
Keep an eye on the condition of all seals, especially the main flange gasket, as these form critical barriers against leaks in all directions.
HV/AC Services
- AC Repair
- AC Replacement
- AC Maintenance/Tune-up
- Ductless Mini Split Installation
- Thermostat Installation/Repair
- Furnace/Heater Repair
- Furnace/Heater Replacement
- Furnace/Heater Maintenance
- Heat Pump Service
Chimney Services
Air duct Services
Plumbing Services
Service Areas
Contact - Schedule a call
At Seattle Air Superior, we have the proper manpower, equipment, and training to perform quality services that put your needs first. We are more than happy to answer any questions and discuss all of your options with you. Contact Us Today.
- Hours of operation:
- Monday - Thursday: 7:00 AM - 6:00 PM
- Friday: 7:00 AM - 3:30 PM
- Saturday: Closed
- Sunday: 8:00 AM - 5:30 PM
Our Services
Installation & Removal, Attic & Crawl Space Cleaning & installation, Vapor Barrier installation, Rodent & Pest Proofing, Water Damage, Drying & Restoration.

With A 5 stars service 12 years in business 0 complaints Satisfaction guarantee. The client enjoy the benefit of one way stop. I fix 99% of the problems. I like what I do and I would like to share my knowledge and skills with my clients and provide top service.